Tuesday, March 24, 2009

Off to the Show


Here's the glue-up of the frame. It looks like an ad for Bessey clamps.


Time was tight in the final phases so I missed photographing how the rockers went on. They are mounted in their slots and pinned in place using a 3/16" diameter, straight grained dowel that I make. This is the final shot of the finished rocker with its seat in place. I leave for the show tomorrow at lunchtime. Wish me luck.

Thursday, March 19, 2009

Home stretch


This is the first dry-fit with all the rungs, arms and the front and back in place. The cauls are mounted on a 1/4" MDF base and are cut to an angle that compliments the angled sides. This gives me square, parallel surfaces for the clamps. 


Before disassembly, I rest the curved backrest blank on the top of the back legs to catch the angle for its mortise. 


This is the last dry-fit before glue-up. I cut the slots for the rockers and shaped the tops of the legs and backrest. Here I'm checking the fit of the backrest in its angled mortises.

Thursday, March 12, 2009

Break-neck pace


I'm marking the sides of the shallow sockets. This face is rounded so I cut a shallow socket to bear against the end of the rung. I use the flat face of the leg to register the blade of my double square. The thickness of its body gives me an offset straightedge that locates the sides of my socket. 


I use 2 identical routers, with different bits. One to cut the socket then another for the deeper mortise.  This shot shows a leg with its joinery completed for this face. I use a 5/8" bit to cut the sockets. This 5/16" bit cuts the mortises. I work from the flat top against a stop to locate my heights.


All the rungs are milled slightly oversized in both width and thickness and given a centered mortise.


Fitting begins with shaping the top to match the socket and adjusting thickness to tight. Here I butt the top of the rung against the top of the socket and mark the bottom of the rung on the leg. This outline shows me where the rung is larger than the socket and where I need to remove material. 


Prior to fitting each arm I need to glue together its 2 pieces. These came out of the same board. Its thickness was the width of the rung. I rip off the rung, then re-saw the offcut to get the thiner wing. Then the finished arm looks as if it were shaped from a single piece.  

Thursday, March 5, 2009

Rocker legs


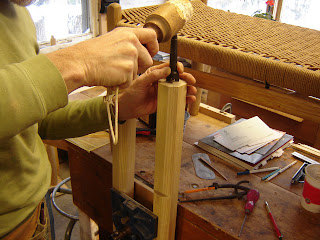
I recently sent off an article about making the leg in the vise. This is the first time that I took the photos for an article. I got good at using my tripod and the camera's timer. This is what my bench looked like after the last shot.


Now I can continue with the rocker. I've milled my leg blanks, routed cross-grain, and knocked off the corners. This makes turning a bit easier but I think I do it for the kindling.


Here I am readying the blanks for the lathe. On my workbench, we can see the bowling bench is back with its slick, freshly woven seat. 


This is a typical timer shot. We can see the chips flying and a fully-turned leg in the back.